Congratulations on deciding to start Calisthenics! You’ve taken the first step toward building strength, improving your fitness and building a foundation to learn impressive Calisthenics skills. Whether your goal is to develop a strong, functional physique or to master gravity-defying moves like human flags and handstand push-ups, you’re in the right place.
Many beginners feel overwhelmed by complicated routines or flashy exercises. Let’s simplify things. Starting Calisthenics doesn’t require a lot of equipment or intricate plans – just a commitment to mastering the basics.
The Three Foundational Exercises
To build a solid foundation we will focus on three fundamental movements:
- Push-Ups
- Hanging Rows
- Squats
These exercises target your entire body and set you up for long-term progress.
Push-Ups: Build Upper Body Strength
Push-ups are a cornerstone of Calisthenics, targeting your chest, shoulders, triceps, and core.
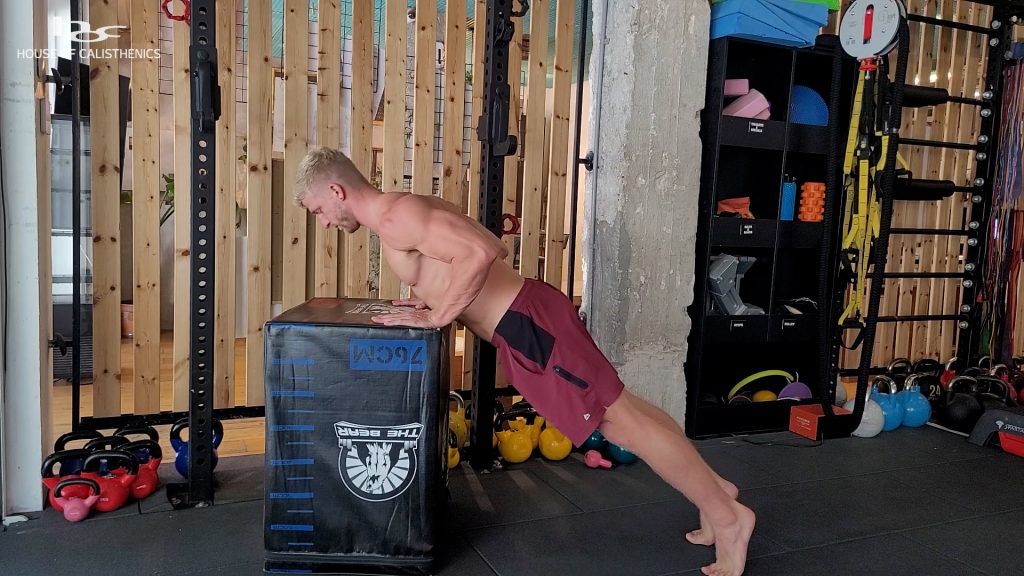
- Adjust Difficulty: Begin with incline push-ups by placing your hands on an elevated surface like a sturdy table or two chairs. If this feels easy, gradually lower the incline until you’re performing standard push-ups on the floor.
- Reps & Sets: Perform 3 sets in a progression that allows you to do 8 – 15 reps
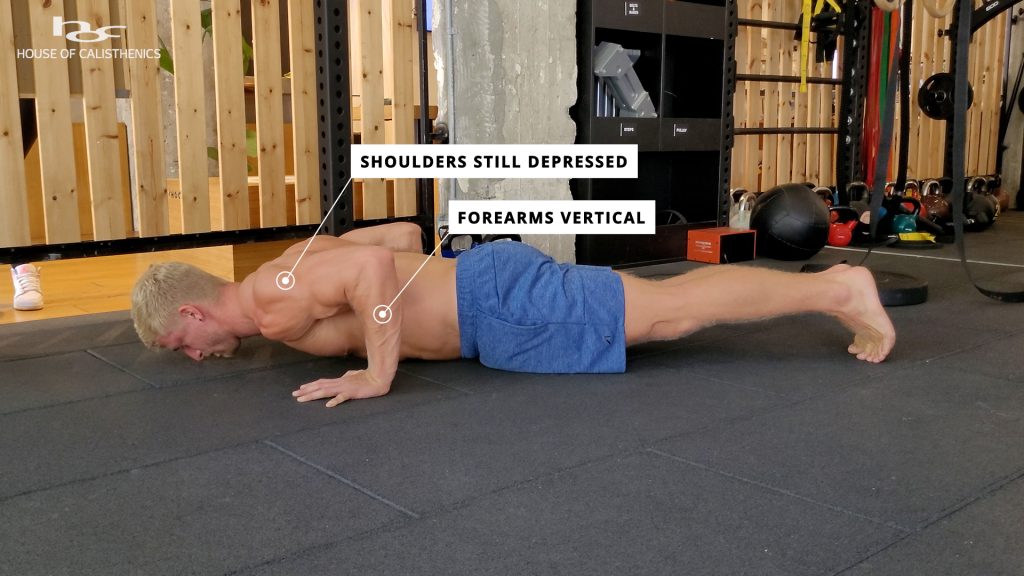
- Technique: Keep your body straight like a plank, lower your chest toward the surface, and push back up with control. Focus on keeping your shoulders from shrugging up, think about pulling your shoulders down and away your ears.


Squats: Strengthen Your Lower Body
Squats are a simple yet effective way to train your legs and glutes.
- Adjust Difficulty: Start easy with bodyweight squats to learn the technique and get into a training routine. Once bodyweight squats become easy, you should start adding weight or progress to single-leg squat variations.
- Reps & Sets: Work up to 3 sets of 30 reps.
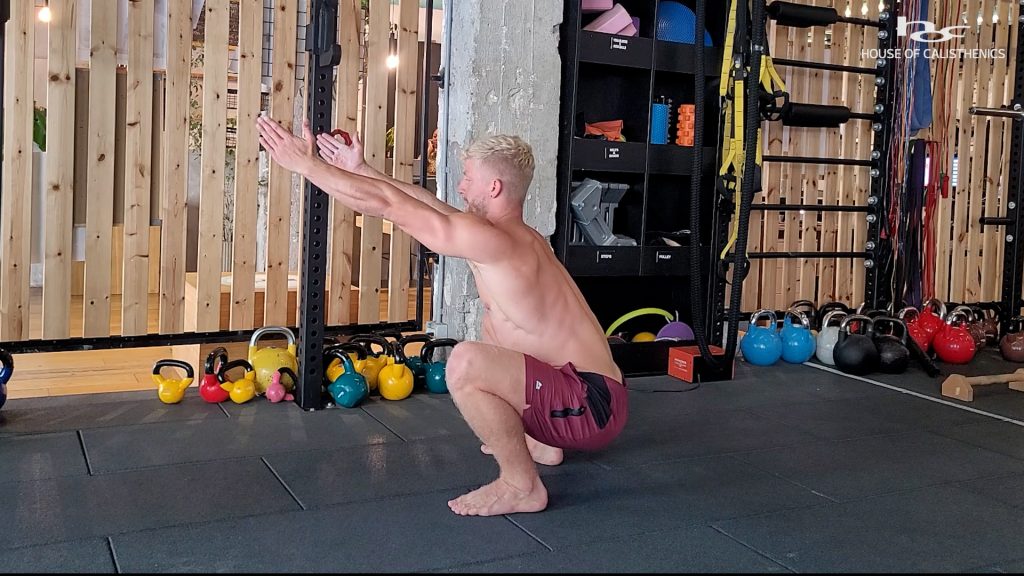
- Technique: Slowly lower your hips in between your legs and focus. Keep your bodyweight evenly distributed over your feet to prevent A) your knees from excessively collapsing inwards and B) heels from coming up. Stay as upright as you can and raise your arms during the descent for better balance.

Hanging Rows: Train Your Back and Biceps
To develop a strong back and arms, hanging rows are essential. You’ll need gymnastic rings – the most versatile tool for full-body Calisthenics training.
Why Rings? Rings are ideal for beginners but also offer endless progression options, from basic rows to advanced moves performed by Olympic-level gymnasts.
Not sure which to choose? Check out my ring-buying guide or trust my recommendation.
Now, back to the Hanging Rows:
- Adjust Difficulty: Adjust the ring height so you can complete 3 sets of 8–15 reps with good form.
- Equipment Tip: If you’re training at home, look for rings with a door anchor.
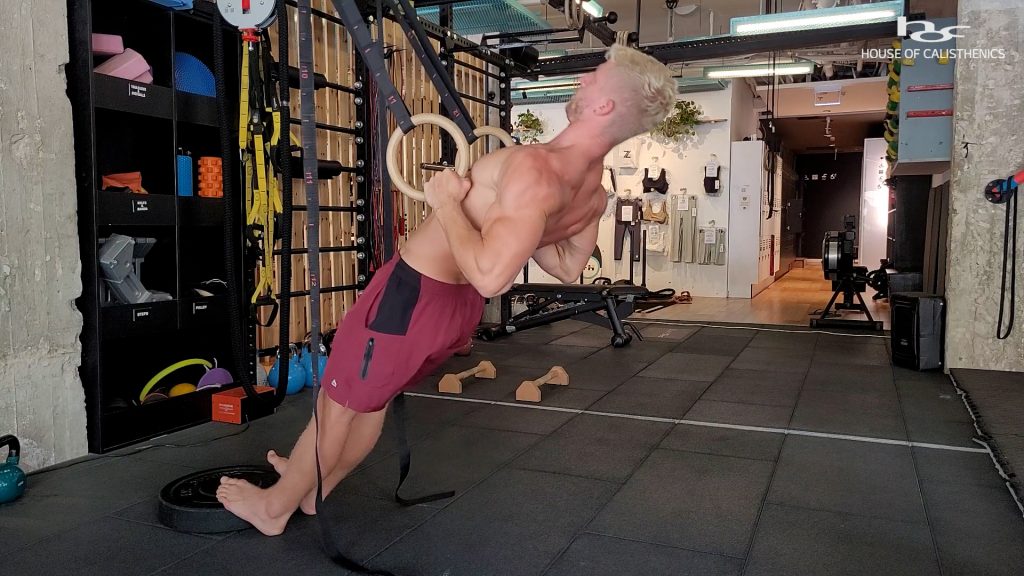
- Technique: Place your feet against something sturdy to be stable prevent them from slipping. Keep your body in one line and pull up until your hands reach your chest.

No Rings Yet? No Problem!
While waiting for your rings to arrive, get started with push-ups and squats. These two exercises alone will kickstart your progress.
What’s Next?
Congratulations! By training these three foundational exercises, you’ve officially started your Calisthenics journey. As you gain strength and confidence, you can begin exploring more advanced movements like pull-ups, handstands and later on even those awe-inspiring human flags and handstand push-ups.
Ready to really learn Calisthenics? Sign up for the free demo of my beginner course or unlock the full course to truly master the basics.
Your journey to get really strong and fit begins now. Let’s make it happen!